As a Cover Designer, How can I upload my Cover Designs on Cover Of The Book?
It’s easy! The first step is just go to the bottom of the page and register a Vendor account. After you type in your email address, you will receive a verification code. Make sure to enter that code to finish signing up. Once you’ve registered, you will have to setup your store
Setup your store by adding store’s phone, logo, banner, description and store location. And please make sure to add PayPal email address as this is how we will pay you. You can do this from the Store Manager then setting and then payment option.
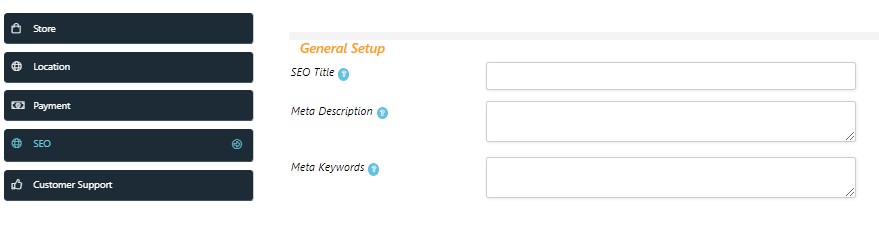
You can also keep your store SEO optimized by adding SEO Title, Meta Description and Meta Keywords
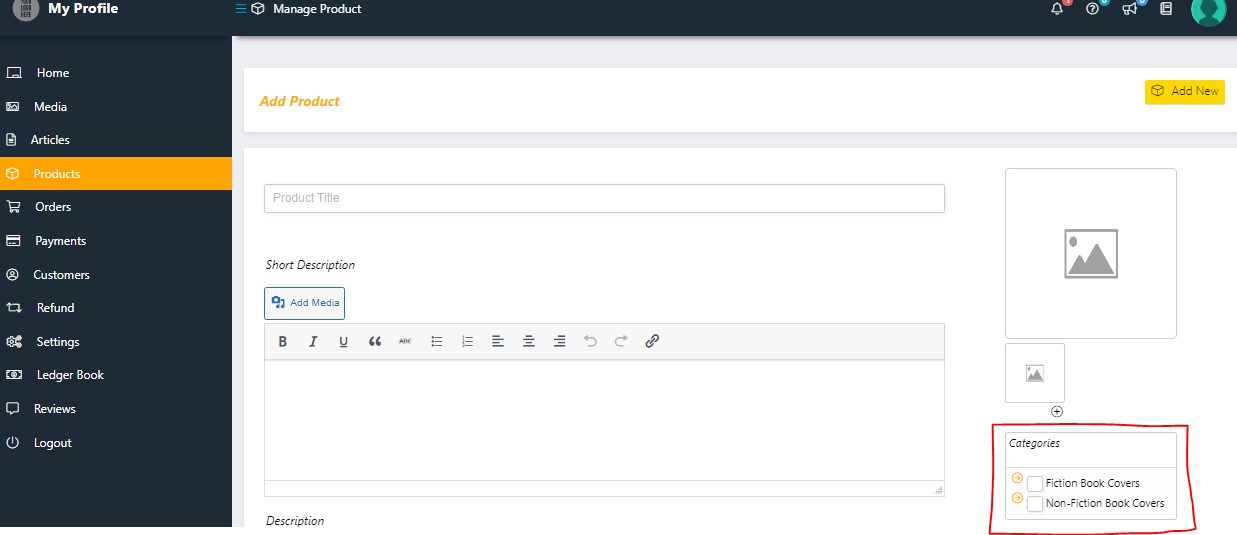
To add your covers, go to the Store Manager. You can access it through the Vender Dashboard available in website’s footer and then Store Manager. Then go to the Products Page and click on Add New button.
Let’s break down how to add a new cover step by step. To start with, give your cover a title.
Next, you need to type in a product’s short description of your cover. Like, what your cover is about?
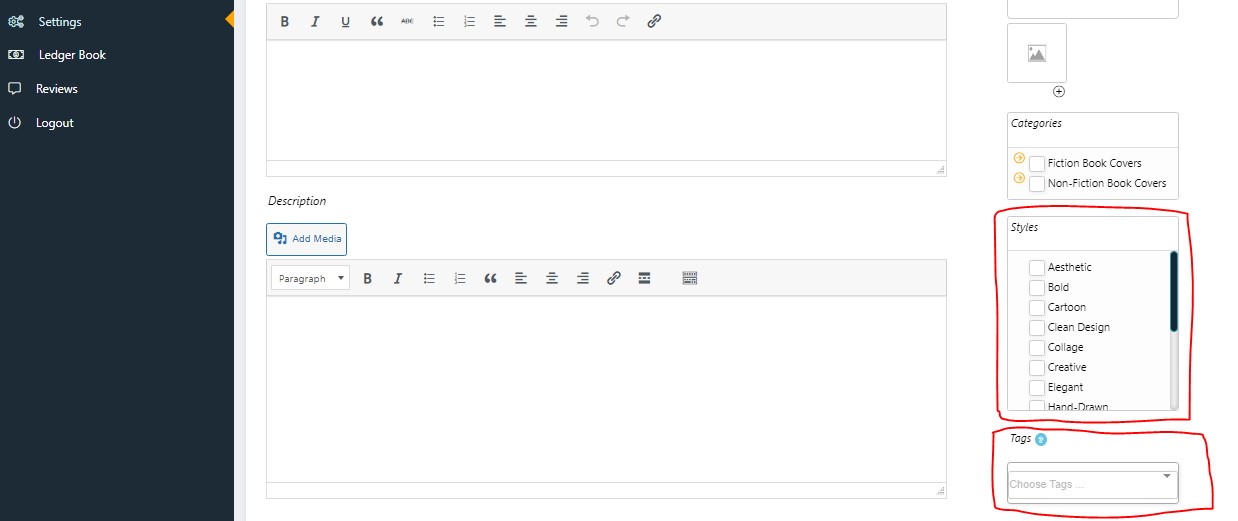
Now here you can write a brief description about your cover. You’re free to write as much or as little as you want.
Make sure to add a product image of your cover so authors can see how it looks. We suggest using an image that’s 750 pixels wide and 1200 pixels long, in WEBP format. Also, include some mock-up text on the cover so customers can imagine what your design will look like when it’s on their books. You can use fictional titles or simple placeholders like “Book Title” or “Title Goes Here”.
First, select the main category that your cover fits into from the Categories list. Then, click the down arrow (↓) next to your chosen category to select the specific sub-category that your cover falls under.
Under the Categories section, you’ll find the Styles section where you can pick the style for your book cover. Right below that, in the Tags section, you can choose tags that match your cover.
Please select the attributes by ticking the Choose an Option. For instance, if you want an EBook cover only, then only select the “EBook Cover”.
Once you’ve chosen the attributes, you’ll need to adjust the prices accordingly. If you’re offering a discount compared to the market price, enter the market price in the “Regular Price($)” field and your discounted price in the “Sale Price($)” field. If you don’t want to display the market price, just enter your price in the “Sale Price($)” box. Remember, you’ll need to set up some variation attributes on the Attributes tab before you can add a variation.
The final step involves optimizing your product for search engines. All you need to do is enter a Focus Keyword and a Meta Description.
Congratulations! Your cover is all set for review. Basically, we’re just gonna give it a once-over to make sure everything looks good and meets our standards. You can expect to hear back from us within 4 to 6 days after we receive your submission.
So, after you make a sale on Cover Of The Book, you’ll get an email with an invoice. Check out the invoice for any info about the customer’s name and the title of their book. If it’s missing, email the customer (you’ll find their address on the invoice) asking for those details. Once you’ve got them, add them to the cover, and then send it over to the customer. More questions? Contact us.